Photo Guide
Photographing secondhand clothes so they sell and arrive as pictured
Last updated 2026-09-27From Plien Roob — AI model photography for online stores
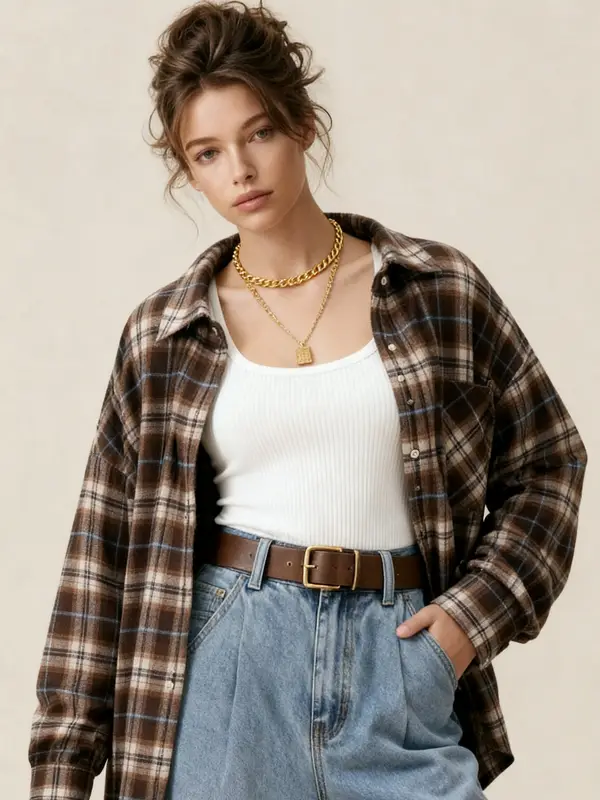

The secondhand clothing photos that sell are the ones that answer every question about condition, size and flaws before the buyer has to message you. Shoot the full front and back, the labels, the fabric, every flaw up close and the measurements with a tape, in window light with no colour edits, then write a condition note that matches the photos. What arrives then matches what the buyer saw before they paid.
The shots you need, in 9 slots
Every new item of the same style looks the same, so one sample photo can stand in for all of them. Secondhand doesn't work that way: each piece carries its own signs of wear, and the photos are the only proof of what the buyer will get. Every shot therefore has to be of the exact piece you will ship, not a brand's website photo or another piece of the same style. Those show a new item, and usually belong to the photographer or the brand.
The big marketplaces limit how many photos you get. Shopee's quality listing criteria page, dated 23 September 2025, allows up to 9 images including the cover, and the TikTok Shop Product Listing Guidelines, dated 16 March 2026, allow up to 9 square images, according to the pages we read on 20 September 2026. The table below fits the shots you need into 9 slots, in the order they should appear in a listing.
If you plan to sell on TikTok Shop, check this first. TikTok Shop Academy's page Restricted Products that Require Category Qualification, dated 31 July 2026 and marked as applying to Thailand, lists pre-owned womenswear and menswear as restricted products, which need approval before they can be listed. For these categories the page says the seller “Must be a Corporate seller”, and the document required for category qualification is a Trade of Antique License (ใบอนุญาตค้าของเก่า on the Thai version of the page) that is valid and displays its expiry date. Sellers who have not been approved are prohibited from listing, sharing or promoting products in these categories. For these categories the page also asks for one brand-qualification document, such as photos of a physical storefront or proof of purchase for at least 5 brands sold in the shop, and pre-owned items outside the page's list are Unsupported Products that can't be sold on TikTok Shop at all. We read the page on 27 September 2026. This summarises the platform's page and is not legal advice, and other marketplaces set their own rules, so always check the rules wherever you sell.
1 Full front
- Why it matters
- It's the cover: buyers see it before they decide to tap in
- How to take it
- Lay it flat on a plain surface and shoot straight down, collar, sleeves and hem in view, with no frame, watermark or text
2 Full back
- Why it matters
- Fading and flaws on the back are exactly what a front-only shot hides
- How to take it
- Turn it over and shoot from the same angle and distance
3 Brand and size labels
- Why it matters
- They show the brand, size and fabric as the label states them
- How to take it
- Close enough to read the text; photograph a cut or faded label as it is
4 Fabric close-up
- Why it matters
- Buyers can't touch it; this shows the surface, the weave and any pilling
- How to take it
- Close up, in the same light as the other shots, with the light coming from the side
5–7 Every flaw
- Why it matters
- A flaw you disclose is information; a flaw the buyer finds is not as pictured
- How to take it
- One photo per flaw, with a finger pointing beside it or a coin next to it for scale
8 Measurements
- Why it matters
- Label sizes differ from brand to brand; a tape measure is more reliable
- How to take it
- Lay the tape on the flat garment so the numbers can be read in the photo
9 Hung or worn
- Why it matters
- It shows how the fabric falls when it isn't lying flat
- How to take it
- Hang it against a plain wall, or wear it and crop your face out if you prefer
| Shot | Why it matters | How to take it |
|---|---|---|
| 1 Full front | It's the cover: buyers see it before they decide to tap in | Lay it flat on a plain surface and shoot straight down, collar, sleeves and hem in view, with no frame, watermark or text |
| 2 Full back | Fading and flaws on the back are exactly what a front-only shot hides | Turn it over and shoot from the same angle and distance |
| 3 Brand and size labels | They show the brand, size and fabric as the label states them | Close enough to read the text; photograph a cut or faded label as it is |
| 4 Fabric close-up | Buyers can't touch it; this shows the surface, the weave and any pilling | Close up, in the same light as the other shots, with the light coming from the side |
| 5–7 Every flaw | A flaw you disclose is information; a flaw the buyer finds is not as pictured | One photo per flaw, with a finger pointing beside it or a coin next to it for scale |
| 8 Measurements | Label sizes differ from brand to brand; a tape measure is more reliable | Lay the tape on the flat garment so the numbers can be read in the photo |
| 9 Hung or worn | It shows how the fabric falls when it isn't lying flat | Hang it against a plain wall, or wear it and crop your face out if you prefer |
If there are more flaws than slots left, drop the fabric shot and the hanging shot first, or show flaws that sit close together in one photo. Whenever you run out of slots, cut the pretty shots first, never the flaws. If the garment has no flaws at all, use slots 5–7 for the inside of the collar, the underarms and the cuffs, to show that the places that usually wear first are still clean.
 Illustration
Photographing flaws as they really are
Before you pick up the camera, go over the garment by the window one part at a time and note every flaw you find. On worn clothes, flaws tend to sit where a full-length shot can't see them.
The inside of the collar, and the collar edge that rubs against the neck
The underarms: yellowing, stains and seams starting to split
Cuffs and hem, where the fabric edge tends to fray before anywhere else
The sides of the body, where the fabric rubs against the arms or a bag and pills
Buttons, zips and elastic waistbands: all there, all working, and still springing back
On trousers, also check the crotch, the knees and the leg openings
A flaw in the photo should look the way it looks to the eye: no bigger, and no fainter.
Get close enough to show what kind of flaw it is, but keep a nearby seam, button or edge in the frame, so buyers can tell where on the garment it is
Rest a finger beside the flaw, or put a coin next to it, to show how big it is, and don't let your finger cover the flaw itself
Holes, pilling and loose threads show up best with light coming from the side; stains and fading read truer in light that falls evenly across the fabric
Don't crop a flaw out of a distant shot. A crop keeps very little detail, so step closer and shoot again instead
Don't edit a flaw to look fainter. A flaw photo is there to tell the truth, not to look good
Measuring: trust the tape over the label
Sizes on labels differ between brands and countries, and some fabrics shrink once they have been washed, so tape-measured numbers are more reliable than the letter on a label. Lay the garment flat, smooth it out without stretching the fabric, and measure:
Chest: straight across from one underarm to the other
Length: from the highest point of the shoulder, next to the collar, down to the hem
Shoulders: from one shoulder seam to the other; sleeves: from the shoulder seam to the end of the cuff
Trousers and skirts: waist, hips and length, plus the width of the leg opening for trousers
Always say the measurements were taken flat. A flat chest, waist or hip figure is roughly half the all-round measurement, and without that note a buyer can be out by a factor of two
Photograph the tape lying on the garment so the numbers can be read. That photo is the proof that the figures you wrote came from this piece
Light and colour that match the real thing
Shoot in daylight by a window with the flash and the room lights off. Mixing two kinds of light shifts the colour
Turn off filters and beauty modes in the camera app, and don't adjust the colour afterwards. A faded shirt that looks vivid in the photo is a shirt the buyer won't recognise when it arrives
Photograph a sheet of white paper once in the same light to keep for reference. If the paper looks yellow or blue in a shot, the garment's colour in that shot has shifted the same way
Use a plain background in a colour not close to the garment's own, so the edges don't melt into it
Keep the same background, angle and distance for every piece. The shop reads as one set, and buyers can compare pieces easily
Shopee's cover-image rules, on a page dated 23 September 2025, make the same point: the image must not be edited so that the product looks different from reality, according to the page we read on 20 September 2026.
 Illustration
Shooting one piece, step by step
Finish every shot that needs the garment lying flat before you hang it. The garment gets handled as little as possible, and every shot gets the same light.
Wash it or iron out the fold marks, then check it for flaws by the window one part at a time, noting each one
Set up a plain background next to the window, with the flash and room lights off
Lay the garment flat and shoot the full front and full back straight down, from the same angle and distance
While it's still flat, shoot the labels, the fabric and every flaw on your list
Lay the tape measure on it and photograph each measurement
Hang it or wear it, and shoot how the fabric falls
Check every photo against the real garment by the window, reshoot any whose colour is off, then place them in the listing in the order of the table above
A condition note that matches the photos
The listing text and the photos have to tell the same story. A photo showing a stain next to a note that says “like new” leaves buyers not knowing what to believe. Keep it short, but cover all of this:
Say it's secondhand in the product title, not hidden in the last line
List every flaw to match the photos: what it is, where it is, how noticeable it is and which photo shows it. For example: faint stain on the front hem, visible up close, see photo 5
Say whether it has been washed. If a mark is still there after washing, say so, and buyers will know it didn't wash out
Give the measurements, and say they were taken flat
If you grade condition as a percentage, always add the list of flaws. A number on its own means different things to different people
If the photos include anything you're not selling, such as a hanger, a belt or an inner top, say it isn't included
AI model photos: where they help, where they don't
An AI-generated model photo helps a secondhand shop by showing how a piece looks when worn, from a single product photo, without finding someone to model a one-off item. But it is an image the AI draws from scratch, not a photograph of the piece you will ship, so it doesn't show the real size or fit — the tape measurements do that. Small flaws such as stains, pilling or tiny holes may not show up in it, and small lettering on a label can come out wrong.
In Plien Roob, the Product to Model and Ghost Mannequin tools instruct the AI to keep the wear, fading and cracked prints shown in your photo and not to make the item look new, but an instruction does not guarantee that every detail comes out right. The pair below is an example from our own system. The photo at the top of this page is also a result from our Virtual Try-On tool: it shows how an outfit looks on, but it can't show the condition of a real garment.
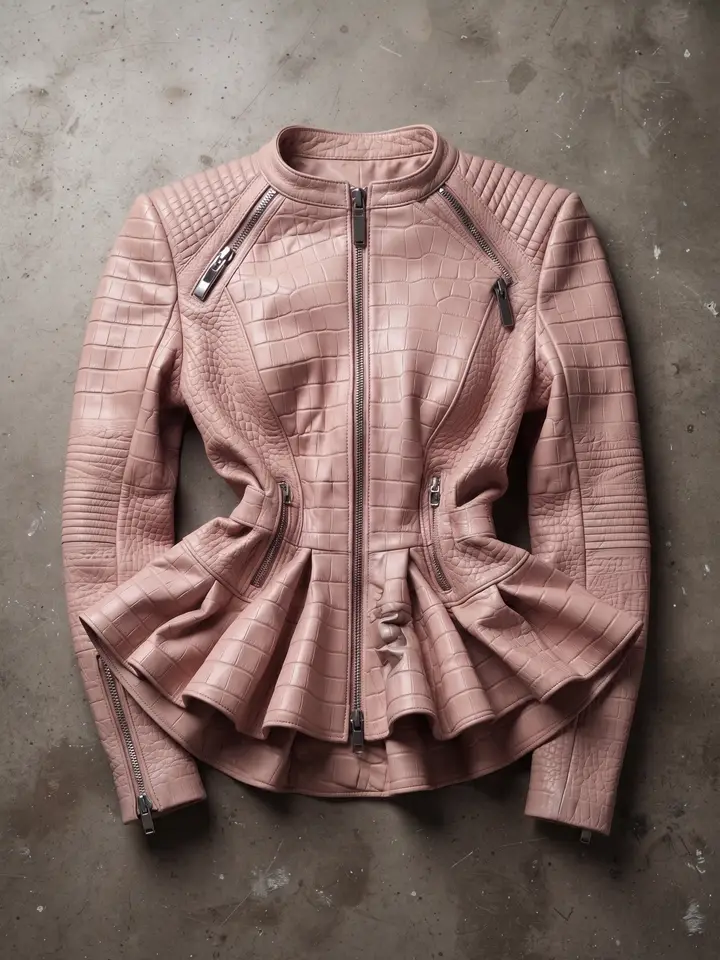 Uploaded
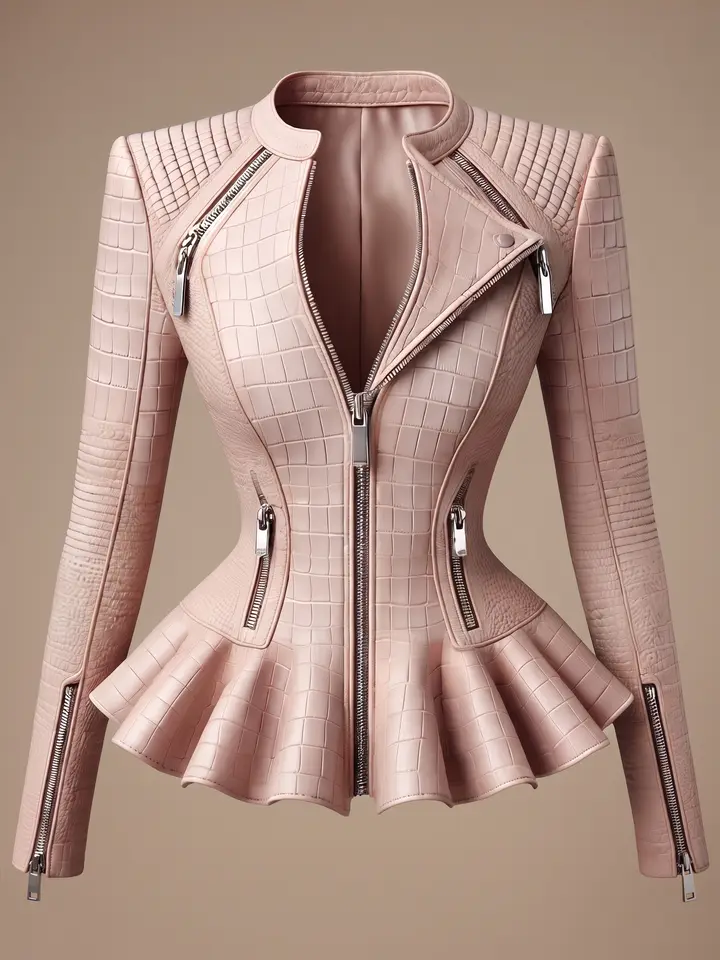 Result
AI photos are extra photos, not replacements. Every real condition shot in the table above still has to be there
Put AI photos after the real ones, and don't use one as the cover
Don't use an AI photo to hide a flaw, such as choosing a pose that covers a hole, or leading with an image in which a flaw has disappeared
Say the image was made with AI. On Shopee, the Shopee AI Terms of Service, version dated 21 February 2568 in the Thai calendar (2025), require AI-generated content to be identified as such, according to the page we read on 20 September 2026
Frequently asked questions
What photos do I need to sell secondhand clothes?
At minimum: the full front, the full back, the brand and size labels, a fabric close-up, every flaw up close, and a photo of the measurements being taken with a tape. If you have slots left, add a shot of the piece hung or worn to show its shape. Every photo should be of the exact piece you will ship, taken in window light with the flash off and no colour edits. If you run out of slots, cut the pretty shots first, never the flaw shots.
Do I need to photograph a tiny flaw?
Yes, every one, however small. A flaw you disclose up front is information the buyer uses to decide; a flaw they discover when they open the parcel is the reason they feel the item isn't as pictured. Shoot one photo per flaw, close enough to show what it is, with a nearby seam or button in the frame to show where it is and a finger or coin beside it for scale, and say where the flaw is in the product description too.
How do I measure secondhand clothes so buyers understand the size?
Lay the garment flat and smooth it out without stretching it. Measure the chest straight across from one underarm to the other, the length from the highest point of the shoulder next to the collar down to the hem, and the sleeve from the shoulder seam to the end of the cuff. Say the measurements were taken flat, because a flat chest figure is roughly half the all-round measurement, and photograph the tape on the garment so the numbers can be read. Tape measurements are more reliable than the size on the label, because brands size differently.
Can I use AI model photos to sell secondhand clothes?
As extra photos, not replacements. An AI model photo shows how a piece looks when worn, but it is a newly drawn image that doesn't show the real size or fit, and small flaws such as stains, pilling or tiny holes may not show up in it. Real photos showing the condition and every flaw must stay in the listing. Put AI photos after the real ones and say they were made with AI: on Shopee, the Shopee AI Terms of Service, version dated 21 February 2568 in the Thai calendar (2025), require AI-generated content to be identified as such, according to the page we read on 20 September 2026.
Can I sell secondhand clothes on TikTok Shop?
Only if you meet the conditions. TikTok Shop Academy's page Restricted Products that Require Category Qualification, dated 31 July 2026 and marked as applying to Thailand, lists pre-owned womenswear and menswear as restricted products. The seller must be a corporate seller and must pass category qualification before listing, and the document required for it is a Trade of Antique License that is valid and displays its expiry date, plus one brand-qualification document, such as photos of a physical storefront. Sellers who have not been approved are prohibited from listing, sharing or promoting products in these categories. This comes from the page we read on 27 September 2026; the rules can change, and this is not legal advice.
Plien Roob
Ready for your first product photo?
Photos by Mediamodifier · CK Hicks on Unsplash