AI Tools
Photographing bags and shoes for an online shop, and how it differs from clothing
Last updated 2026-09-07From Plien Roob — AI model photography for online stores

You sell bags or shoes, and every product-photography guide you open turns out to be about clothing — so half the advice fails on your products from the first line. This page answers three things: what our system does with bags and shoes that it does not do with clothing, which tools work on them and which will not touch them, and how much testing they have actually had. That last one is the part we most want you to read, because the honest answer is: far less than clothing.
Three things bag and shoe sellers hit that clothing sellers never do
The shape does not come from a body. Put clothing on a person and the real shape appears. A bag or a shoe already holds its own shape, so buyers look at other things entirely: the metal hardware, the clasp, the strap and the handle, the heel height, and the shape of the sole.
Framing is a completely different problem. Standing up, a person's head and feet sit at opposite ends of them. A frame in which the shoe is large enough to read has no room left for a face. That is geometry, not something better prompt writing makes go away.
The rule that is right for clothing is exactly wrong for shoes. Normally we instruct that a trouser hem should break over the top of the shoe, so the legs do not look pasted on. But when the shoe is the product, that same rule means half of it is under fabric.
 Illustration
The first button to press is Product type
In the Product to Model tool, the very first control is called Product type, and it offers eight choices: unspecified, clothing, footwear, bag, hat or eyewear, necklace, earrings, and ring or bracelet. The default is unspecified, which means the system reads the photo itself — that works, but the result is not the same every time. The moment you tell it footwear or bag, three things change at once: the framing the system selects for you, the pose the model takes, and the list of things that must never cover the product.
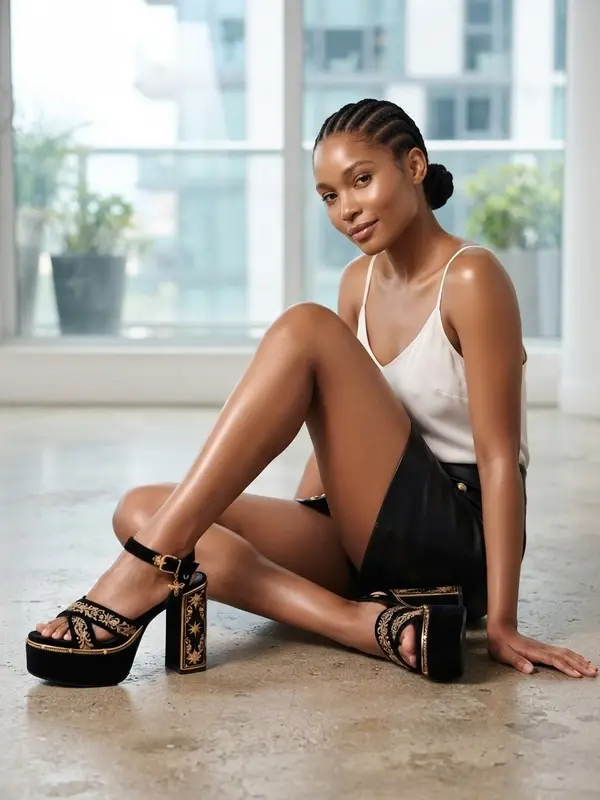
Choose footwear and the framing is set to half-length for you. But half-length for footwear does not mean waist-up as it does for clothing — it means the system brings the model down to floor level, sitting, kneeling, crouching or reclining, so that her face and both shoes fit inside the same photograph without cropping her head away.
If you pick a standing or walking pose card yourself, the system always obeys the pose you chose and crops from the waist down to the floor instead — because standing and seeing both the face and the shoes genuinely cannot happen at once.
When the shoe is the product, the hem rule flips. The system instructs that the trouser hem must end above the ankle, so nothing drapes over the product.
The verb changes too. With no product type set, the instruction says wearing or carrying, which leaves room for the model to hold the shoes in her hand rather than wear them. Once you press footwear, only one verb remains: worn on her feet. If the held look is what you wanted, go back to unspecified.
Choose bag and half-length becomes mid-thigh up, so the whole bag and the hand or shoulder carrying it are both visible. The system instructs the model to carry it forward of her body — hanging from one hand at hip height, hooked over the forearm, or held by the top handle in front — never tucked behind her hip or pressed flat against her back.
Bags get one more instruction that is sent every time regardless of the pose you choose: the front face of the bag, its closure and its hardware must be turned toward the lens rather than edge-on or away.
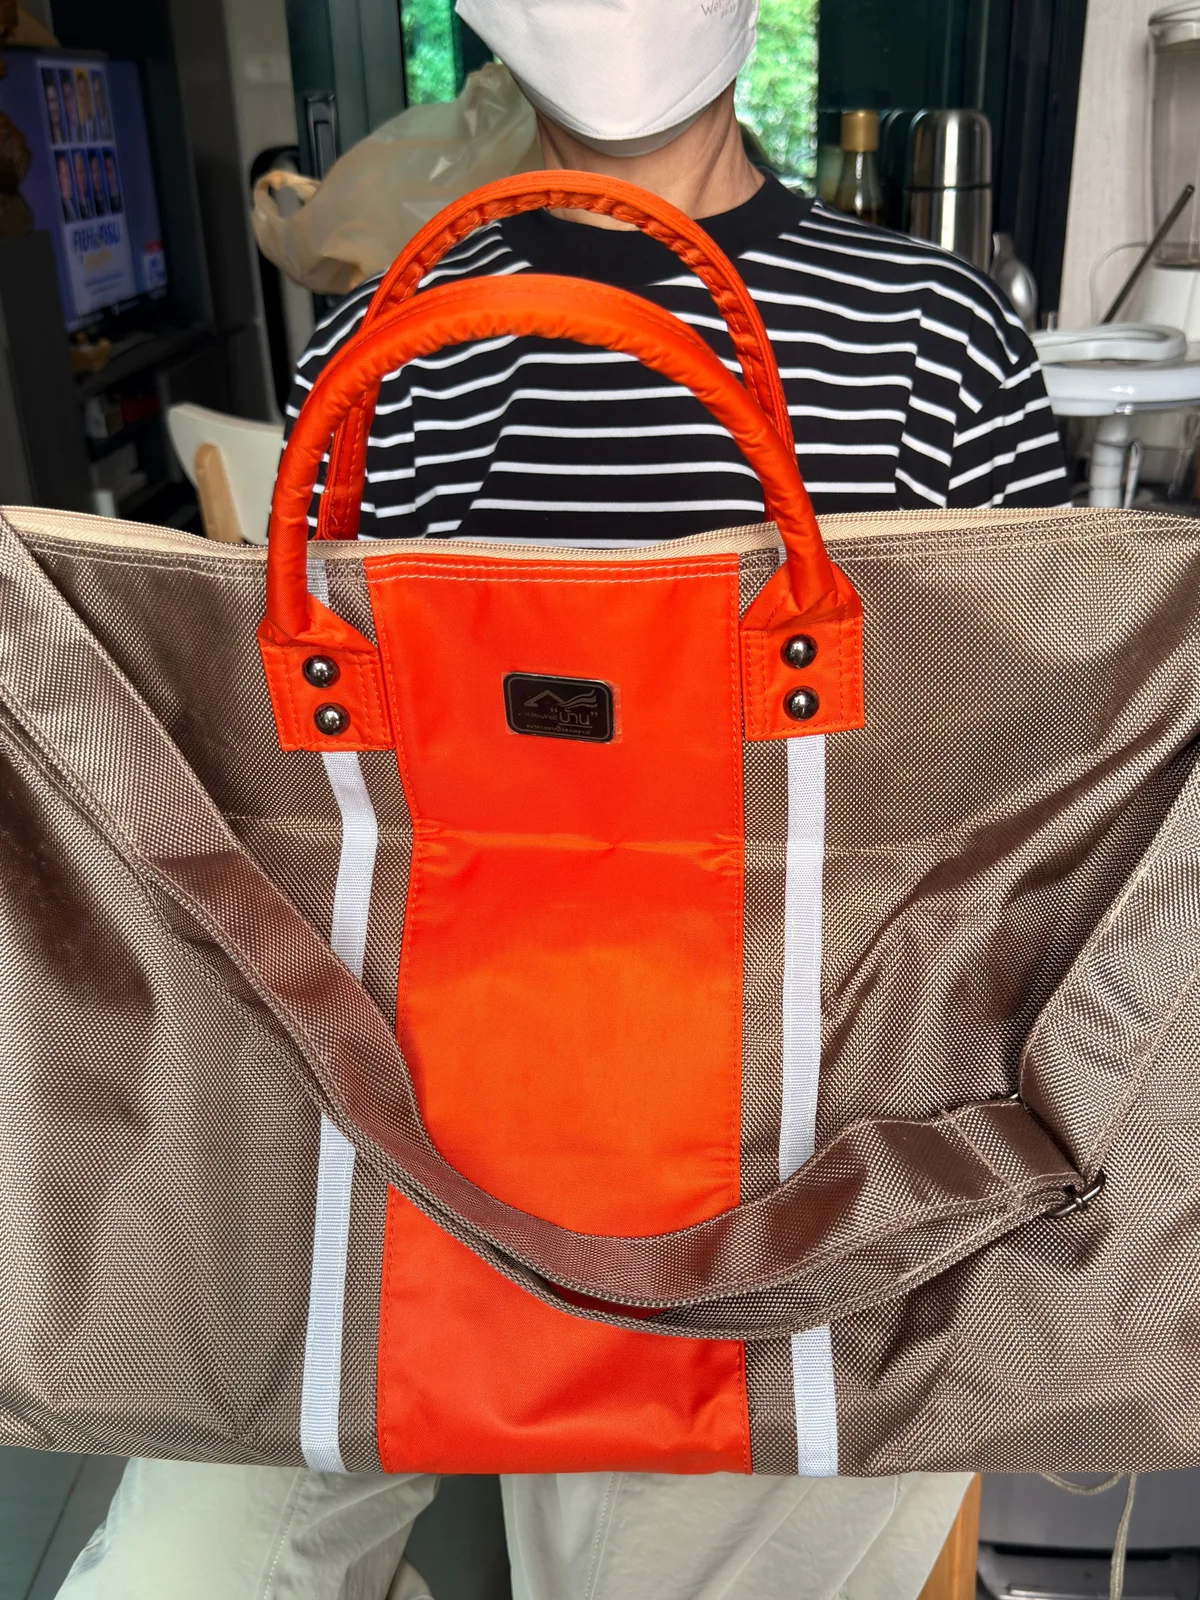
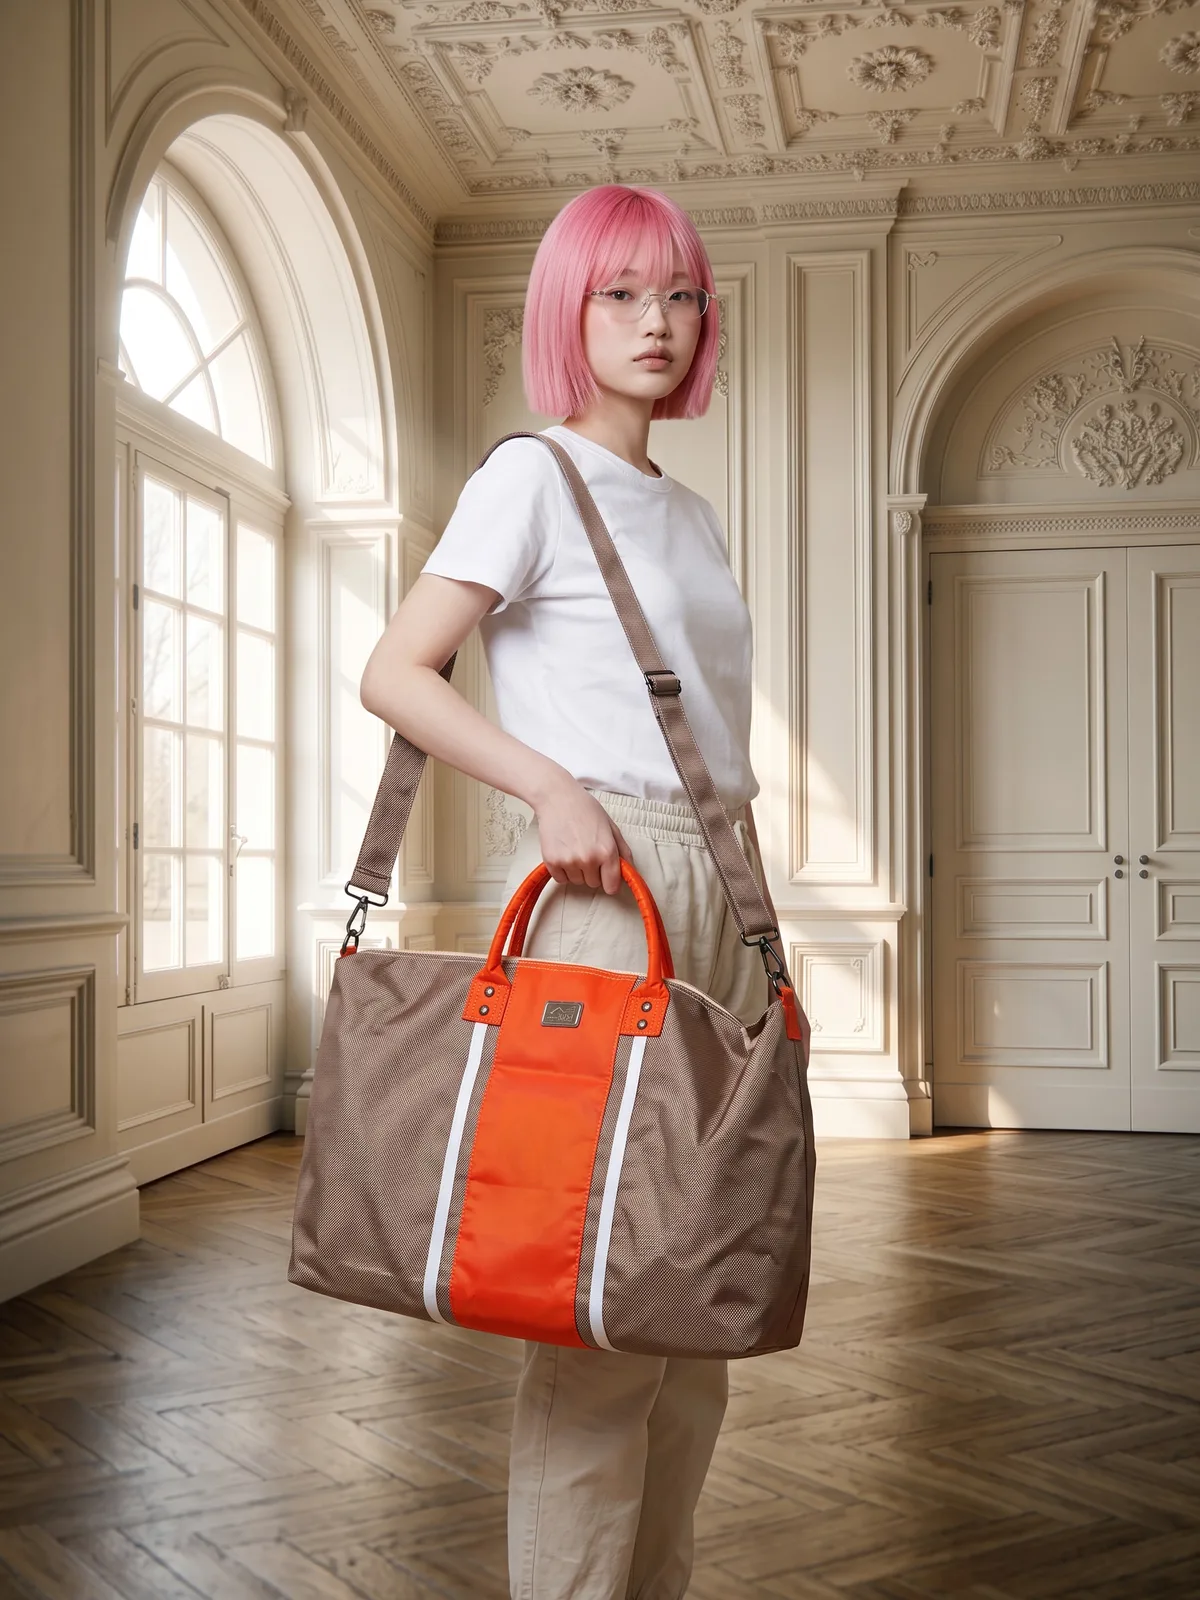
Here is the part we have to say plainly: we have tested bags and shoes far less than clothing. For clothing we have a record of 17 images generated from one jacket in a single morning, across 14 poses and 9 settings, each checked against the real product. Bags have never been through anything like that. Since we wrote the bag-specific pose instruction we have generated 6 bag images from 4 bags; the bag came out as the same bag every time, with its front fully in view. One of them was not usable for a listing: the upload showed someone holding the bag in a kitchen, and with a library model chosen but no scene, the result stayed in that kitchen, with the model wearing the face mask and striped T-shirt from the original photo. The next run used the same photo with a library scene as well, and produced the image below. Before the pose instruction existed, two bag images were fired and both passed. Added together that is still a single-figure number from a handful of bags. Shoes have had more than that, but not everything passed either: before the seated rule existed, two shoe images in a row came back with the model's head cropped out of frame, which is a shoe advert with nobody in it. We fixed it by bringing the model down to floor level and firing again, which put the face and both shoes in one photograph. We tell you this because we would rather you spent free credits on your own products than took our word for it.
Which tools work with bags and shoes
Product to Model: yes, and it is the main route. 2 credits per image at standard quality, 5 at premium. It is the only tool with a Product type control.
Image Set: yes, and it has the same Product type control. One press gives you 7 images — but the product type you chose is passed only to the ones with a model in them. One image in every set is a ghost mannequin shot, which does not receive it and means nothing for a bag or a shoe.
Ghost mannequin: not for bags or shoes. The control on screen is called Garment category and offers only tops, bottoms and dresses, while the instructions behind it are written for six kinds of clothing: t-shirt, shirt, jacket, dress, skirt and trousers.
Try-on: we do not recommend it. It takes two images, a person and a garment, with no text box and no product-type control at all — and our testing records contain no bags or shoes whatsoever. The test sheet we wrote covers clothing types only.
Background removal, 1 credit per image: yes. It is not tied to a product type. But to be straight with you, we have not tested it systematically on other kinds of product.
Upscale, 1 credit per image: yes. Product type is irrelevant to it, because it enlarges the image you already have rather than drawing a new one.
One thing to watch: nothing stops you from selecting a shoe photo in ghost mannequin. No warning appears, the job is submitted normally, and if it runs to completion the credits are charged normally — because we refund automatically for failed jobs, not for results you did not like. The ghost mannequin instruction asks for the product to hold a human torso shape, with a soft shadow underneath and the inside of the collar visible, and a bag or a shoe has none of those three things. The result is unpredictable. If what you want is the product on a clean surface, use background removal instead.
The framing the system selects for each product type
Unspecified and clothing are set to full-length.
Footwear, bag, hat or eyewear, and necklace are set to half-length.
Earrings and ring or bracelet are set to close-up.
All of this is a starting choice, not a lock. The framing control still offers all three options and you can change it whenever you like.
The reason it is set for you is that the product reads more clearly, not that fewer jobs fail. We wrote that second reason down once and withdrew it the same day, because the figures behind it came from barely more than a dozen images — far too few to conclude anything.
How to shoot the source photo of a bag or a shoe
 Illustration
Photograph shoes as a pair in one frame, not one shoe. Our instruction asks for both shoes complete from toe to heel. If your source only shows one, the other will be drawn from guesswork.
Position the bag so its front face, its clasp and its hardware are clearly visible, because those three are exactly what our instruction asks the AI to reproduce faithfully. If the photo does not show them, there is nothing to copy.
Fill the frame with the product. Do not shoot from far away with the item small in the middle, because the detail the system gets to see shrinks in proportion.
The shorter side of the image must be at least 480 pixels, at least 1024 is recommended, and around 1280 upward is what has proven to work best. JPEG, PNG and WebP are accepted, up to 15 MB per file.
Use the original file from the device that took it, not one forwarded through a chat app — those compress the file on the way. The two look identical on screen and are not the same inside.
Shoot against a surface that contrasts with the product: dark shoes on a pale surface, pale bags on a dark one. The edge you get that way is cleaner than one repaired later by background removal.
Check that no other site's watermark is sitting in the photo. This is not a hypothetical warning — we have run into it ourselves.
Generate, then zoom in on the clasp, the hardware, the stitching and the sole of every single result. Do not judge from the thumbnail in the gallery grid, because thumbnails make everything look tidy.
What it costs in credits
Product to Model: 2 credits per image at standard quality, 5 at premium.
A model from the system library: plus 1 credit at standard, nothing extra at premium.
Scene, pose and styling items counted together: plus 1 credit for 1 to 2 items, plus 2 for 3 to 5.
Try-on: 2 credits per image at a single quality level. Ghost mannequin: 2 credits per image at standard quality and 4 at premium.
Background removal: 1 credit per image. Upscale: 1 credit per image.
Failed jobs are refunded automatically without you having to ask, but an image that generated successfully and simply did not please you is not refunded.
Signing up gives you 10 free credits, once, with no card required. With no extras selected that is 5 Product to Model images at standard quality — enough to answer whether the kind of bag or shoe you sell comes out well. One thing to know before you spend them: your first image on the free plan has no watermark, but every image after it carries our watermark burned into the file itself, not laid over the screen, so it cannot be removed and the image cannot be listed for sale. The free plan is there for judging quality, not for doing real work.
Frequently asked questions
How do I photograph a bag for an online shop?
Start with the source photo. Position the bag so its front face, its clasp and its hardware are clearly visible, fill the frame with it, use the original file from the device that took it rather than one forwarded through a chat app, and keep the shorter side at least 480 pixels, with 1024 or more recommended. Then, if you want a photo of a model carrying it, use the Product to Model tool in Plien Roob at 2 credits per image at standard quality and set Product type to bag. The system will instruct the model to carry it forward of her body rather than tucked behind her hip, turn the front of the bag and its clasp toward the lens, and change half-length framing to mid-thigh up so both the bag and the hand carrying it stay in frame.
Can AI put my shoes on a model?
Yes. Use the Product to Model tool and set Product type to footwear. The system sets the framing to half-length for you, and half-length for footwear means bringing the model down to floor level — sitting, kneeling, crouching or reclining — so her face and both shoes appear in the same photograph, with the trouser hem instructed to end above the ankle so nothing covers the product. If you pick a standing or walking pose yourself, the system obeys that pose and crops from the waist down instead. It costs 2 credits per image at standard quality and 5 at premium. Worth knowing first: our testing on shoes runs into single figures, not dozens, so spending free credits on your own product is the best way to judge.
Does ghost mannequin work on bags or shoes?
No. Ghost mannequin works on clothing only. Its instructions are written for six kinds of garment — t-shirt, shirt, jacket, dress, skirt and trousers — and the control on screen, Garment category, offers only tops, bottoms and dresses. What to watch out for is that nothing stops you from selecting a shoe photo there: the job is submitted, and if it runs to completion the credits are charged normally, because we refund automatically for failed jobs only. If you want a bag or a shoe on a clean surface, use background removal at 1 credit per image instead.
Why is the model's head cut off in my shoe photo?
Because standing up, a person's head and feet are at opposite ends of them, so a frame in which the shoe is large enough to read has no room left for a face. We ran into this ourselves on two images in a row. The fix is to set Product type to footwear and choose half-length framing: the system then instructs the model to come down to floor level rather than stand, which is the only way a face and a pair of shoes share one photograph. If you pick a standing or walking pose card yourself, the system always obeys your pose and therefore has to choose the product's side, cropping from the waist down. If you want the face as well, choose a seated pose card.
Can I use AI photos for branded bags?
The system does not block branded products, and the instructions we send the AI forbid inventing brand tags or logos that are not already in your source image. But using an AI-generated image in place of a real product photograph may lead buyers to believe it came from the brand, which is a separate matter from selling authentic goods. That point has not been reviewed by a lawyer, so if branded goods are your main business, get advice first. The other rule you cannot skip: never upload an image carrying another site's watermark, because on 12 August 2026 we confirmed the AI copies that watermark into the result.
Plien Roob
Ready for your first product photo?
Photos by Pablo Figueroa · mostafa mahmoudi on Unsplash