AI Tools
Product photo sizes and aspect ratios: one image, several channels
Last updated 2026-09-07From Plien Roob — AI model photography for online stores
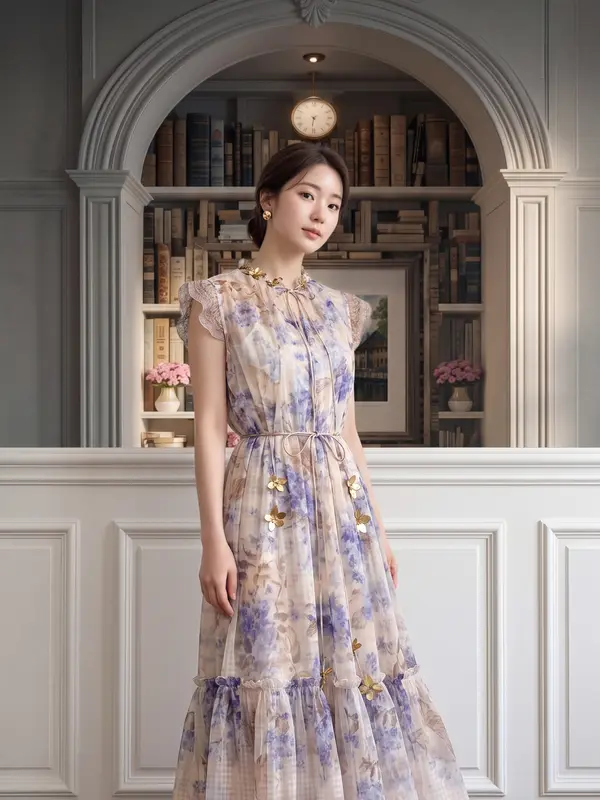

You photograph one product, then have to list it in three or four places. In one of them the image is cut square and the hem of the skirt disappears. In another it floats in the middle of the screen with empty space all around it. Same file everywhere. This is not happening because your file is not good enough. It happens because each place has a frame of its own and squeezes your photo into it. This page explains the way of thinking that lets one set of images work in several places, without paying credits to generate a fresh one for every channel.
The problem is not the file, it is the shape of the frame
Every place you post has a fixed shape it puts images into. A product grid needs every cell to match, so it favours squares. A feed you scroll with your thumb favours tall images, because they take up more of the screen. Short clips and stories fill a phone screen, which is very tall. When your photo is one shape and the frame at the other end is another, the system there decides for you what to cut off and where to leave empty space — and it has no idea where in the picture your product is.
 Illustration
Think in ratios, not in pixels
The ratio is the shape of the frame: as wide as it is tall, or taller than it is wide. Pixels are how much detail sits inside that frame. Those are two different questions with two different fixes, and the ratio comes first, because the ratio is what decides whether your product gets cut off — and it is the part you can actually set in our app before you press Generate. We offer four shapes: 1:1, 4:5, 3:4 and 9:16.
1:1 is a square, as wide as it is tall. It is the shape product grids commonly use, because every cell in a grid has to be identical.
4:5 is a shallow portrait, slightly taller than it is wide. It claims a lot of feed space without being tall enough to risk having its top and bottom trimmed.
3:4 is one step taller again. A full-length garment fits comfortably, and it is the shape the system picks for you when you ask for a full-length shot without choosing a ratio.
9:16 is the tall shape that fills a phone screen. It is the shape of short clips and stories, and a still image in this shape sits behind a clip edge to edge, with no black bars above and below it.
There is no landscape option at all. All four choices are square or portrait. That is a real limitation, and the reason for it is in the next section.
The cheapest order of operations: choose first, crop afterwards
Decide where this image is mainly going. One place is enough — you do not have to answer for every channel.
Open the studio and press the control called Ratio in the bottom toolbar, then pick that shape. This step costs no extra credits whichever shape you choose.
Generate, and look at the result. If the shape is right on the first image, everything left to do is cutting down, not generating again.
Need another shape as well? Press Edit image and crop. That runs on your own device and costs no credits either.
Save each cropped version as its own file. Do not save over the original, because whatever you cut away cannot be brought back.
Which tools let you set the ratio before generating
Try-on · has the Ratio control.
Product to Model · has the Ratio control.
Ghost mannequin · has the Ratio control.
Image Set · no control. The system sets a shape per image based on that image's framing. A set contains both full-length and half-length shots, so the whole set comes out portrait, but not all in the same shape.
Upscale · no control, because it does not draw a new picture. Whatever shape went in comes back out, larger.
Background removal · no control, for the same reason. It cuts the background out of the existing picture and the frame stays exactly as it was on every side.
The Ratio control offers no landscape shape at all. If you genuinely need a landscape image, the only route today is to generate portrait and crop the top and bottom away — which means accepting the loss of either the head or the hem. We chose it that way on purpose: asking the AI to draw a landscape picture of a product photographed upright means it has to invent scenery on the left and right to fill the extra width, and the more it invents, the higher the chance your product's detail drifts. Cropping does not touch the product by a single pixel.
What happens if you never press it
The first option under Ratio is called Let the system choose, and it is the default. That phrase used to mean we sent no value at all and let the provider guess, which did not work. The project's owner fired 8 test images in one day and got 4 different shapes back. So we counted every old job in the database and found that jobs sent without a ratio came back not-portrait somewhere between roughly one in five and almost half the time, even though the instruction asked for a full-length shot — while every job that was sent a ratio came back in the shape it was asked for. Since 2 September 2026, Let the system choose means the system always sends a shape that matches the framing. It is no longer silence.
Full-length framing: the system sends 3:4.
Half-length framing: the system sends 4:5.
Close-up framing: the system sends 1:1.
Ghost mannequin has no framing control, so with no ratio chosen it comes out 3:4.
Try-on is the single exception. If you choose nothing, we send nothing, because we measured 11 jobs with no value sent and every one came back the same shape. That provider already has a firm default of its own, and overriding it would be a risk with no problem behind it.
There are two cases where pressing Ratio changes nothing. The first is the dressing-room top-up mode, which you can only reach by sending a finished image on to be worked on further. That mode instructs the system to keep the existing image whole — the person, the pose, the background and the frame — so the ratio you chose is not sent. The button still works, but the image comes back in its original frame. The second is fantasy models: choose one of those and the screen warns you itself that, in real testing, adding a ratio tends to break shots of this kind. What the system recommends there is adjusting only framing and quality.
Cropping only takes away — it cannot add back
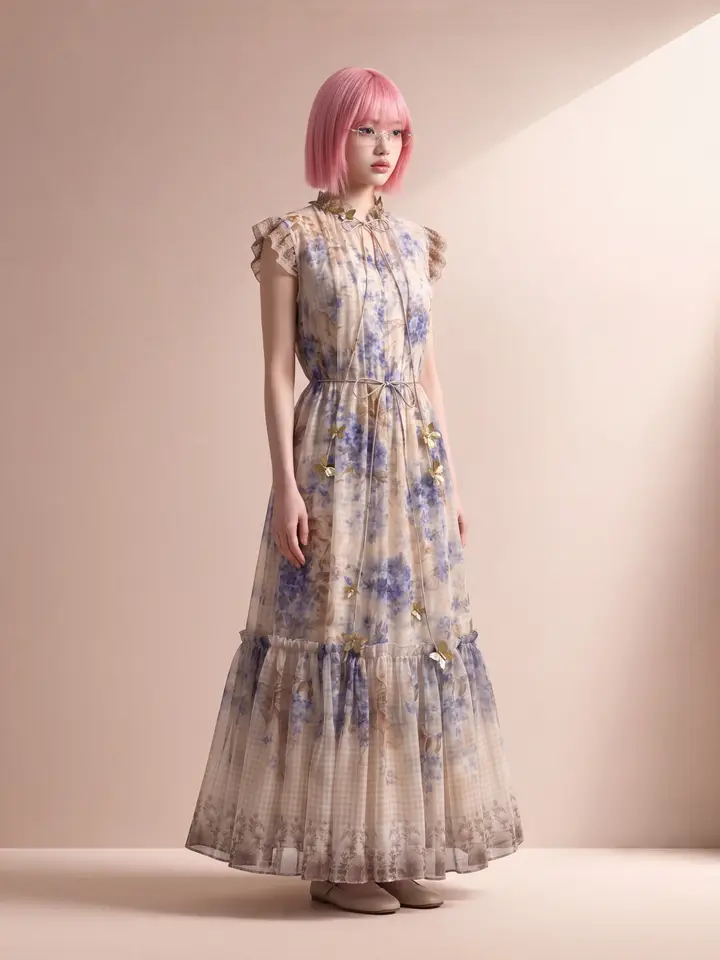
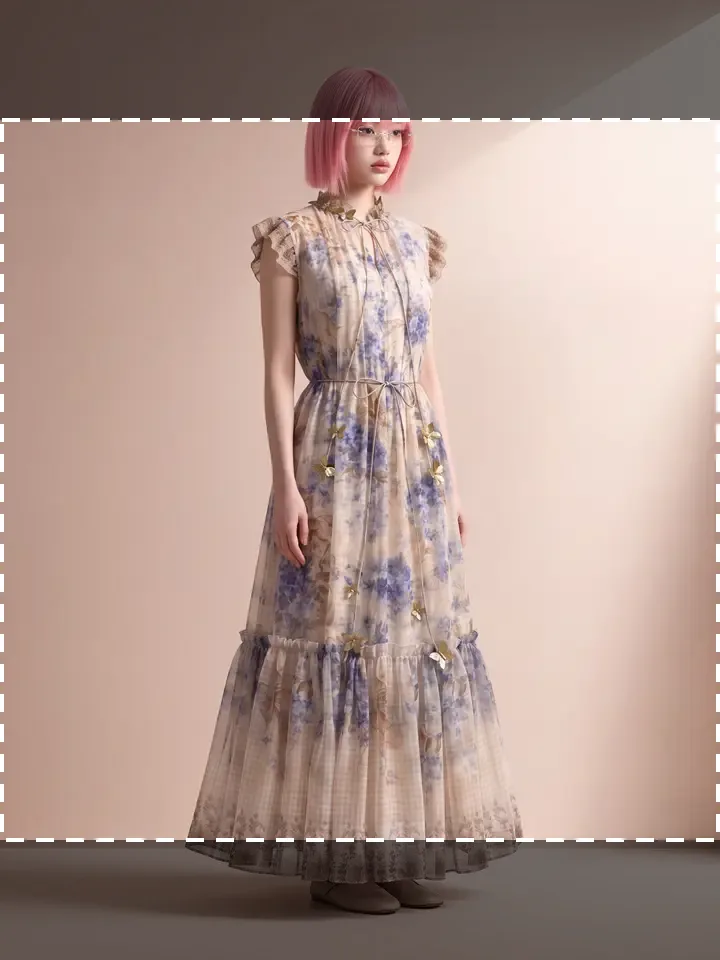
This is the most important sentence on the page. Cropping removes what you do not want, and it can never create a side of the picture that is not in the file. That is why the order in which you choose the shape matters so much, and the arithmetic behind it is simple. When you crop a portrait image to a square, the tool keeps the full width and trims the height. What you lose is the top and the bottom — the head and the hem — not the left and right sides.
From 4:5 to square: about one fifth of the height is cut. This is the cheapest crop there is.
From 3:4 to square: about a quarter of the height goes. Half-length shots survive it; full-length ones usually lose the feet or the hem.
From 9:16 to square: nearly half the height goes. A full-length shot almost never survives.
From square to 9:16 is worse still, because nearly half the width has to go, leaving a narrow central strip. If the product is not dead centre, it gets clipped.
If you have to pick one shape as the source for every channel, 4:5 is the most flexible, because it crops down to square with the smallest loss of height. A 9:16 version is better generated separately than cropped out of another shape.
The crop tool only offers Full image, 1:1, 3:4 and 9:16 as ready-made frames — there is no 4:5 button yet. If you want 4:5, choose it at generation time, or drag a free frame and judge the proportion by eye, which is hard to get exact. That gap is ours, and we would rather write it down than hide it.
How to crop, and where the button is
Open the image you want — either one you just generated in the studio, or an older one in your library.
Tap the image once to open it enlarged.
Press Edit image.
Press Crop, then pick a frame: Full image, 1:1, 3:4 or 9:16 — or drag your own.
Move and resize the frame so the product sits where you want it, fully inside the frame rather than just touching its edge.
Press Save image, and repeat one shape at a time if you need several shapes from the same picture.
Three things worth knowing about the editor. First, it runs entirely on your own device and fires no AI job, so it costs no credits however many times you crop. Second, saving always uses the file's full resolution, not the reduced size shown on screen. Third, a PNG with a transparent background is still a PNG after cropping — the transparency survives — while an opaque image comes out as a JPEG, which opens anywhere.
Pixels still matter, but they do a different job from the ratio
The ratio says what shape the image is. The pixels say how much detail is inside that shape. Cropping always costs you the second one, because every edge you cut away is fewer pixels left. Crop hard enough that the shorter side falls below 480 pixels and our system will not take that image back in to work on. Pressing Upscale after a crop does not bring back detail you have already cut off, either. If you know in advance that you will be cropping several shapes out of one image, premium quality on Product to Model produces a larger file than standard, which leaves you more pixels to cut into.
Phone photos that turn up sideways on their own
One more symptom that looks like a ratio problem but is not: you shoot a photo upright, and somewhere else it appears on its side. Most phones store the picture rotated and write a tag inside the file saying how far to turn it before displaying. Software that ignores that tag shows the picture as it was actually stored — sideways. When you upload to us, we physically rotate the file upright according to that tag before storing it, and then strip every piece of hidden data out, including the GPS location phones attach. Images that leave our system are already the right way up and do not depend on that tag any more.
 Illustration
Why we do not print each platform's pixel numbers
There is not a single platform's pixel figure on this page, and that is deliberate. We searched twice and found nothing usable. What we found was other companies' blog posts, an old document for a different country's marketplace, and a page written for developers — none of them a help page for Thai sellers today. Those numbers also change whenever the platform feels like it, without telling us. If we print one and it changes, you are the one who loses time. The most reliable figure is the one on the help page of the place you are actually listing on. Open it there and follow it there. What we can guarantee are our own requirements, because we wrote them.
What it costs in credits
Choosing a ratio before you generate costs no extra credits, whichever shape you pick.
Cropping with the Edit image button costs nothing either, because it runs on your device and fires no AI job.
What costs credits is generating a new image: Product to Model 2 credits per image at standard quality and 5 at premium, Try-on 2 credits per image, ghost mannequin 2 credits per image at standard quality and 4 at premium, upscale 1 credit per image, background removal 1 credit per image.
Re-running the same image just to change its shape is charged in full every time, exactly like a new image. That is the entire reason this page insists on choosing the shape first and cropping afterwards.
Failed jobs are refunded automatically without you having to ask, but an image that generated successfully in a shape you did not want is not refunded.
Signing up gives you 10 free credits, once, with no card required. With no extras selected that is 5 Product to Model images at standard quality — enough to check whether the shape you picked comes out the way you pictured it. One thing to know before you spend them: your first image on the free plan has no watermark, but every image after it carries our watermark burned into the file itself, not laid over the screen, and it is a pattern repeated across the whole image rather than one mark in a corner, so cropping does not remove it. The free plan is there for judging quality, not for doing real work.
Frequently asked questions
Can one product photo work for every channel?
Yes, if you do things in the right order. The cheapest route is to choose the ratio that matches wherever the image is mainly going before you press Generate. In Plien Roob the control is called Ratio and sits in the bottom toolbar of the studio, offering 1:1, 4:5, 3:4 and 9:16, and choosing a shape costs no extra credits. After that, crop down to the other shapes with the Edit image button, which runs on your own device and is also free. The thing to know is that cropping only takes away and never adds back. The most flexible source shape is 4:5, because it crops to a square with the smallest loss of height, while a 9:16 version for clips and stories is better generated separately, since cropping another shape down to 9:16 costs you between about a quarter and nearly half of the width, depending on where you start.
How do I get a 4:5 image?
You have to choose it before generating. Press Ratio in the bottom toolbar of the studio and pick 4:5. It is available on Try-on, Product to Model and ghost mannequin, and costs no extra credits. The reason you have to choose it then is that the crop tool behind the Edit image button only offers Full image, 1:1, 3:4 and 9:16 as ready-made frames — there is no 4:5 button yet. If you have already generated, what is left is dragging a free frame and judging the proportion by eye, which is hard to get exact.
Does cropping an image in Plien Roob cost credits?
No. The Edit image button, which crops, draws and adds text, runs entirely on your own device and fires no AI job, so it costs nothing however many times you use it. You can open it on an image you just generated in the studio, and on any image in your library: tap the image to open it enlarged, then press Edit image. Saving always uses the file's full resolution. A PNG with a transparent background stays a PNG, and an opaque image comes out as a JPEG. Only generating a new image costs credits.
What size should product photos for an online shop be?
Every platform sets its own numbers and changes them whenever it likes, so we do not print any of them here. Open the help page of the place you are actually listing on and follow the figures there. What we can confirm, because they are our own system's rules, is this: an uploaded image must have a shorter side of at least 480 pixels, 1024 or more is recommended, and around 1280 upward works best. JPEG, PNG and WebP are accepted, up to 15 MB per file. The ratios you can choose before generating are 1:1, 4:5, 3:4 and 9:16. If you cannot decide, think in shapes rather than numbers: square for the cover image in a product grid, portrait for feeds, and 9:16 for short clips and stories.
If I choose a ratio, will the image be stretched or distorted?
No. The system does not take an existing picture and pull it wider or taller. It states the frame before anything is drawn, and the AI composes to fit that frame from the start. What genuinely changes is the scenery around the product, because a wider or taller frame needs something to fill it, and the pose may not match a reference image exactly. The instructions we send always ask for your product's pattern and colour to be kept as in the photo you uploaded — but the more scenery the system has to invent, the higher the risk that detail drifts. If you want another shape with nothing around the product changing at all, generate one shape and crop, because cropping does not touch a single pixel of the picture.
Can I make a landscape image?
The Ratio control has no landscape option yet. The four shapes on offer — 1:1, 4:5, 3:4 and 9:16 — are square and portrait. If you must have landscape, the only route today is to generate portrait and use the free-form frame in the Edit image tool to crop the top and bottom away, which definitely costs you either the head or the hem. We chose it that way because asking the AI to draw a landscape picture of a product photographed upright means inventing scenery to the left and right to fill the extra width, and the more it invents, the higher the chance your product's detail drifts. Cropping does not touch the product at all.
Plien Roob
Ready for your first product photo?
Photos by V H · ian dooley on Unsplash